

Letting your users upload a file directly to your Publitio account has never been easier with our new feature.
I present to you the Upload Preset Widget. What is an Upload Preset Widget?
First of all, if you haven’t had a chance to get familiar with our Presets I advise you to read through this post.
In short, a preset is a list of predefined options which you can use for your future uploads.
You can use presets when uploading a file via our dashboard, use it along our API and SDKs and now we can also use unsigned presets without any programming knowledge just by copying and pasting your Preset Upload Widget code to the page where you would like to enable your users to upload files.
Let’s make a simple example of the page with an Upload Preset Widget.
First of all I am going to create a new folder called "presetfolder" in my dashboard so I have all of uploads through my widget on one place.
Next, we want to create a Preset. You can do so by going to your Publitio settings -> Upload Presets, go ahead and hit that Add Upload Preset button.
You will be presented with a bunch of options you can set for your future files, I am going to leave everything as default and only change the Folder of my preset to the one I created before.
Also the most important thing here is to allow unsigned uploads and this means anyone without an authentication can upload a file via this preset and will enable the Upload Widget for this preset.
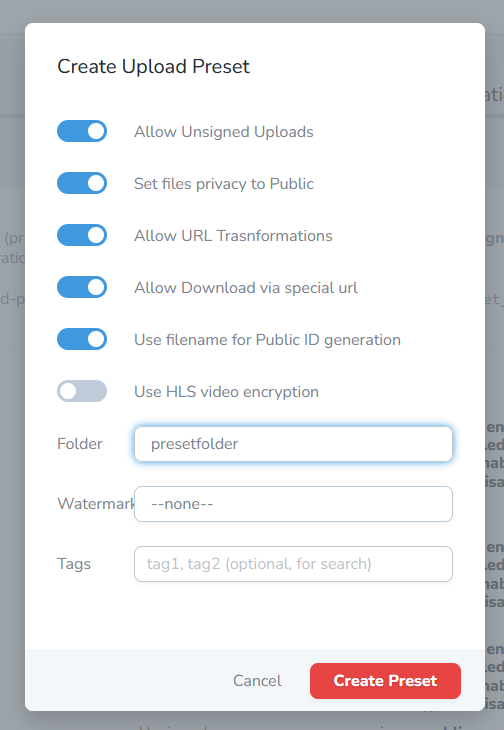
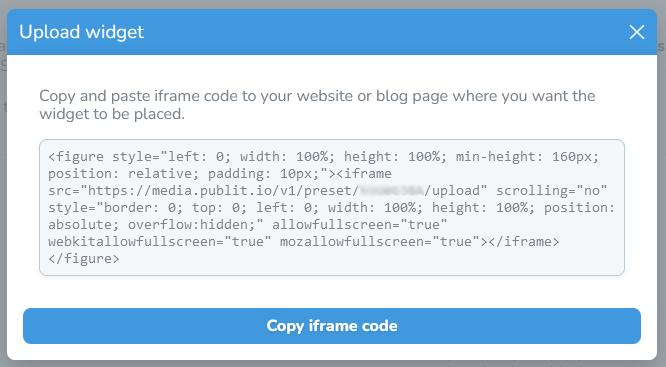
Hit Create Preset and after the preset is created you will see it in your list. What we wanna do now is grab our Upload Preset Widget code by clicking on the little code icon on the right of our preset.

A popup will show up holding the code we need so simply click the Copy iframe code.
I will be using a simple Wordpress page as an example but for embedding to any kind of other CMS or custom pages should be fairly similar as long as we can enter custom HTML code.
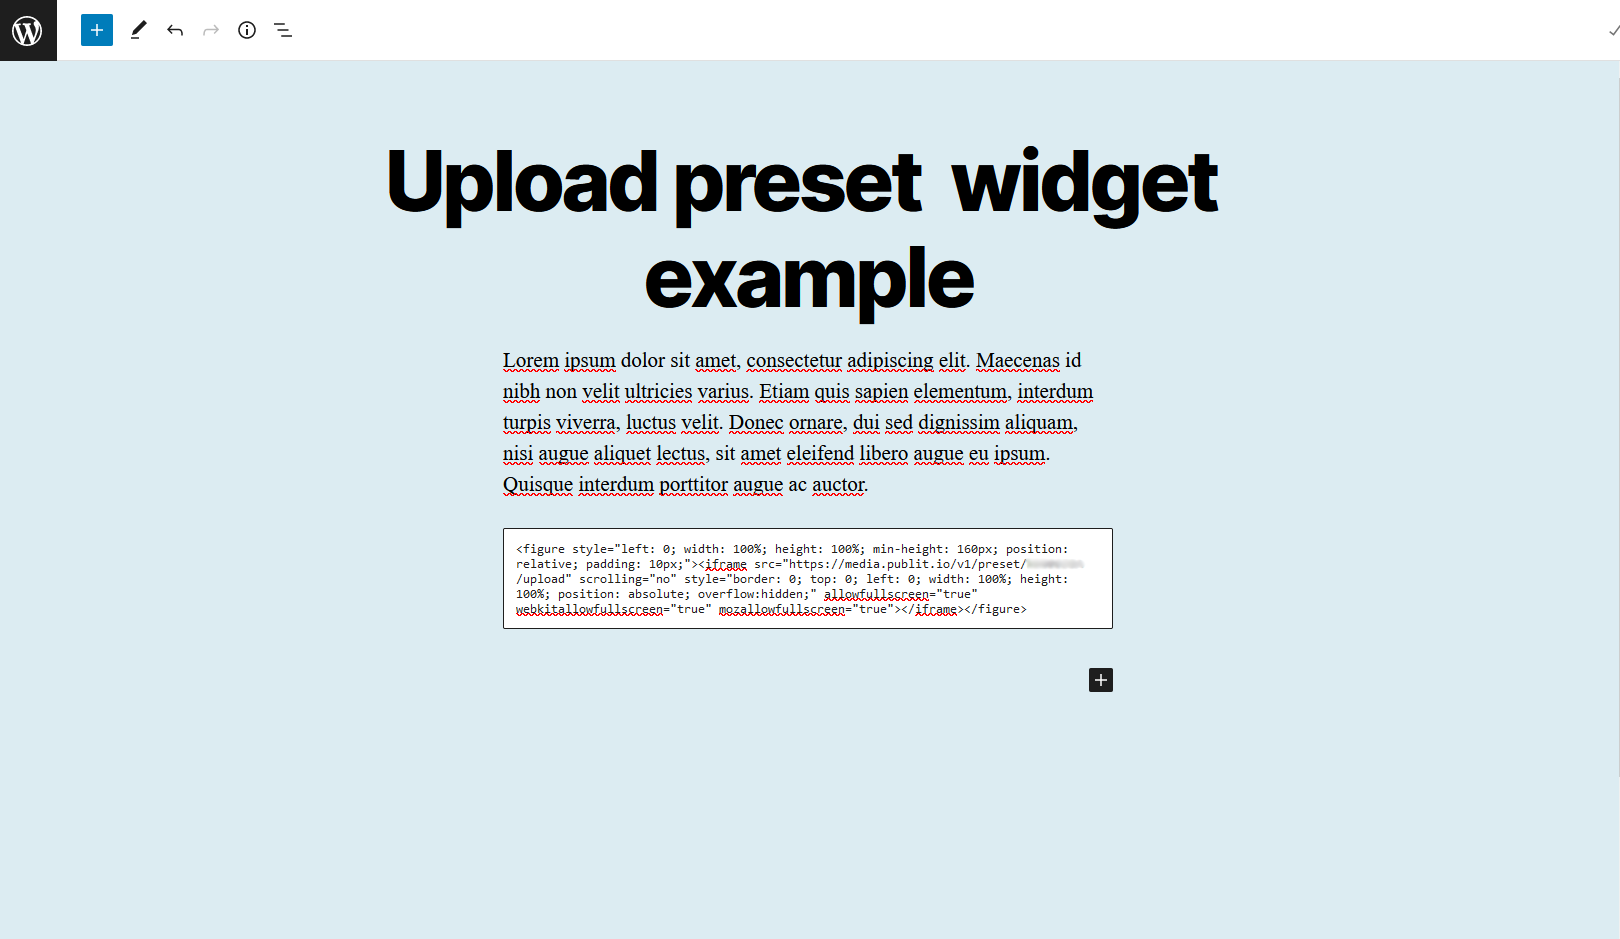
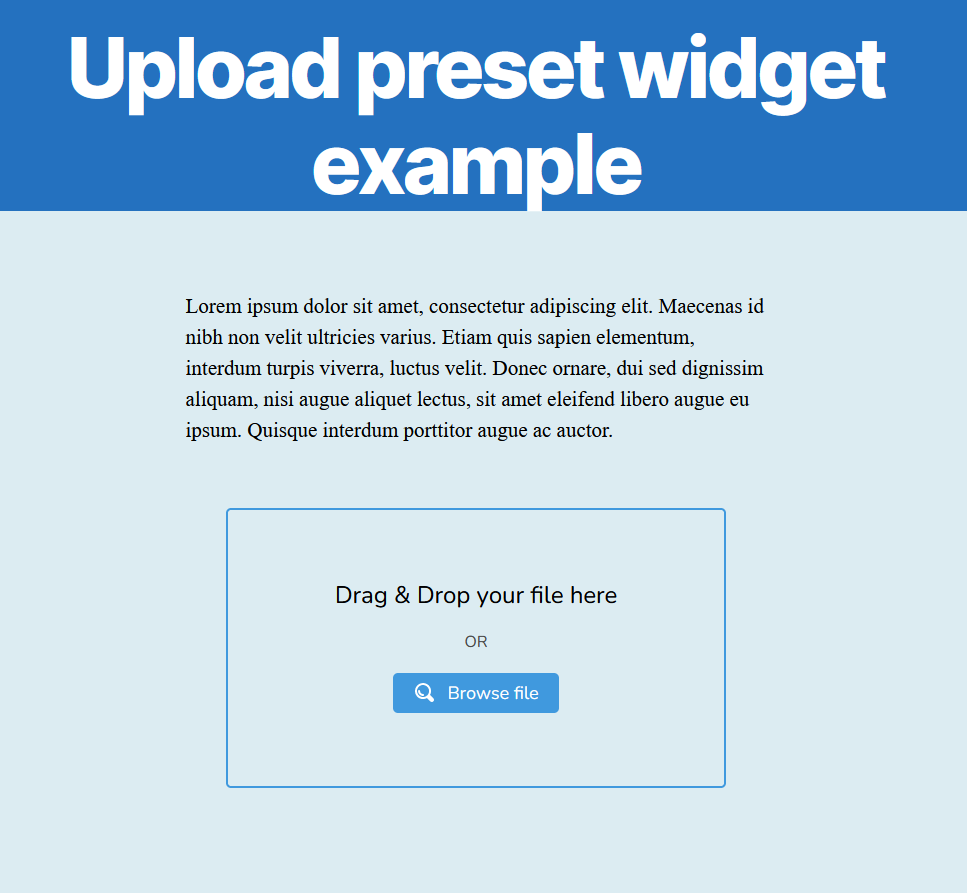
And this is how it looks like on frontend:
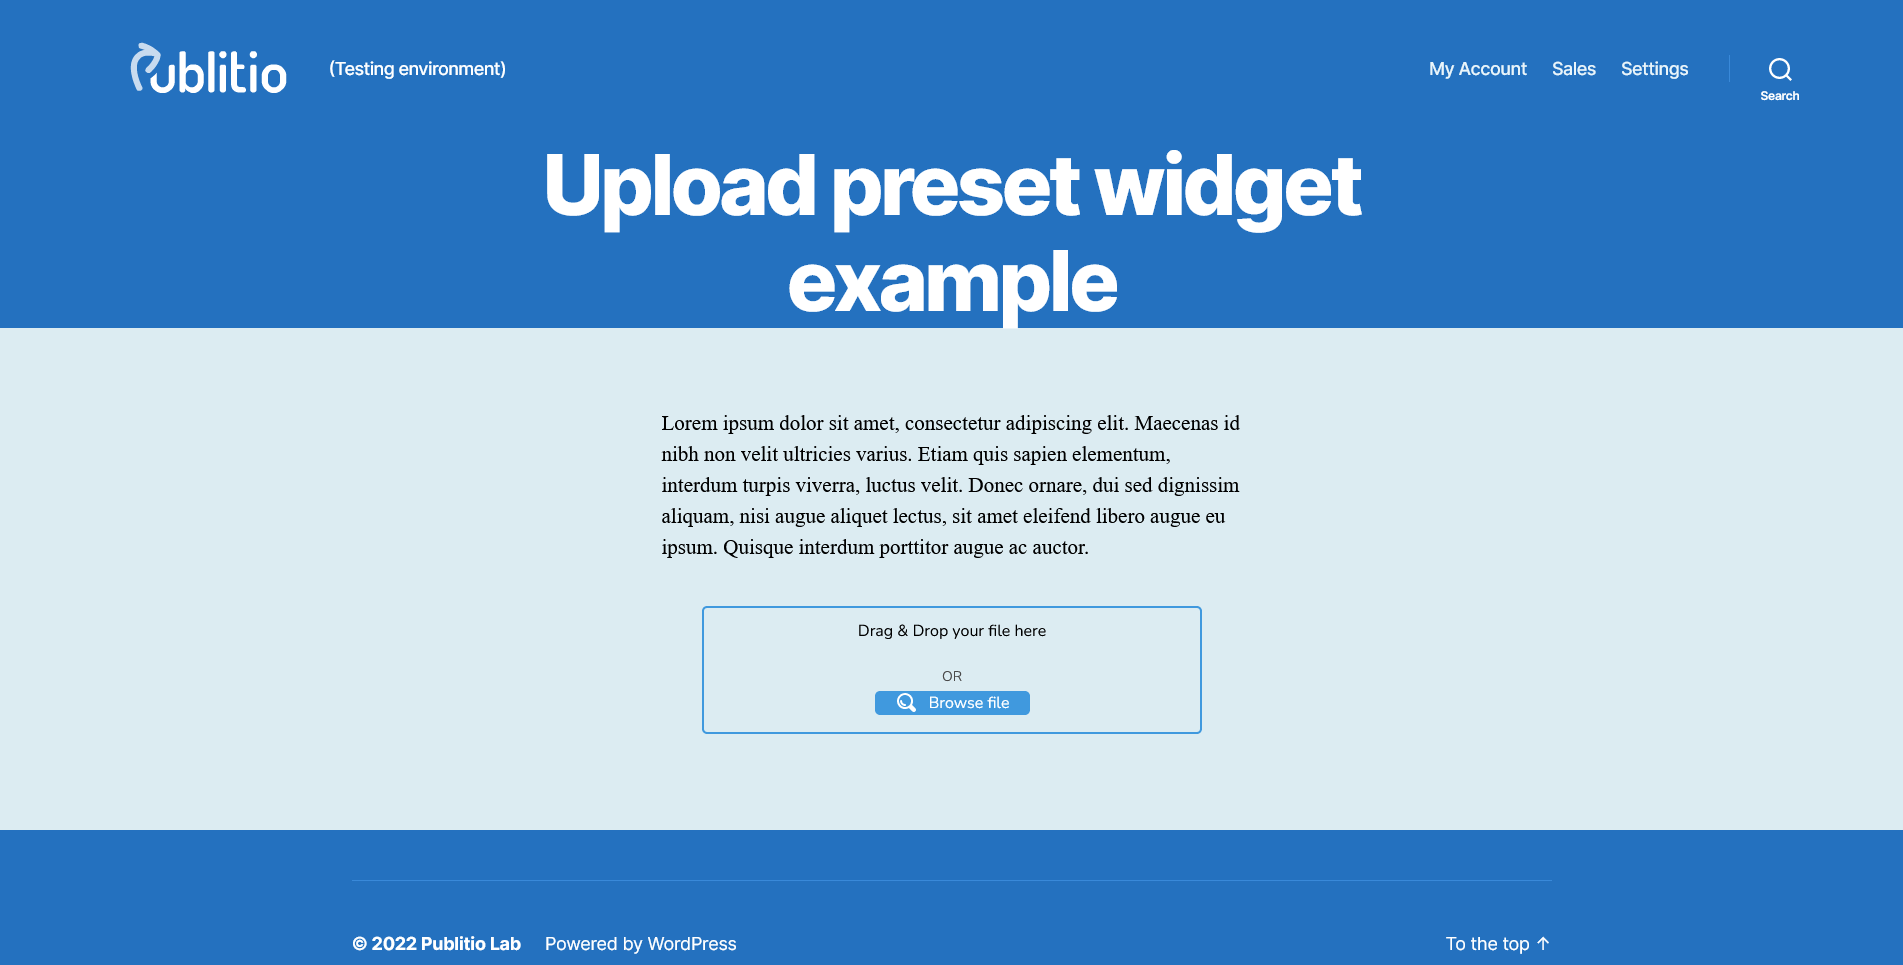
You can notice that the upload box is smaller than before, this is because the widget is responsive, meaning it will always fill the container it is in.
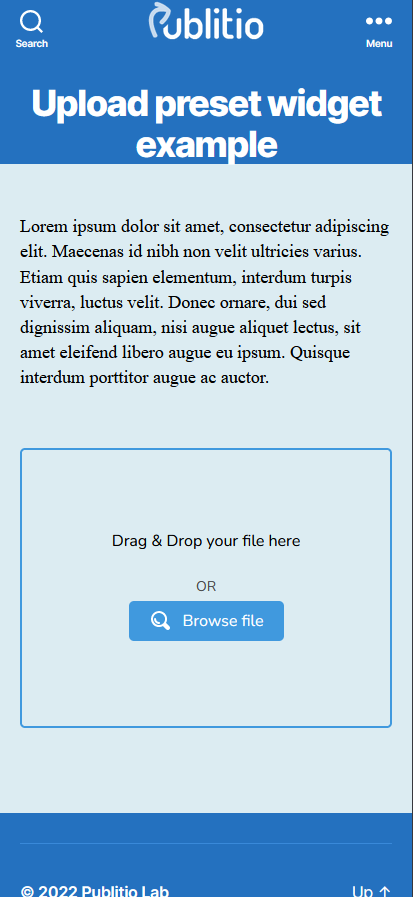
Here are some more examples:
It is even mobile friendly:
It features Drag and Drop as well as simple file selection so lets upload a file.

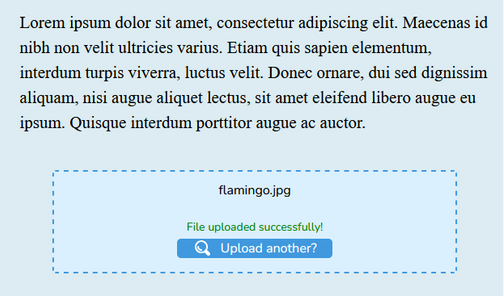
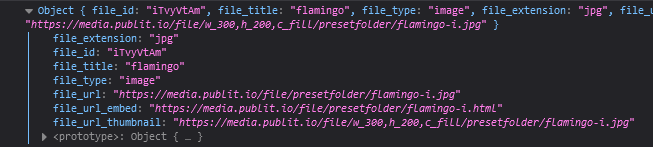
When the upload finishes we can go back to our Publitio folder and see the uploaded file.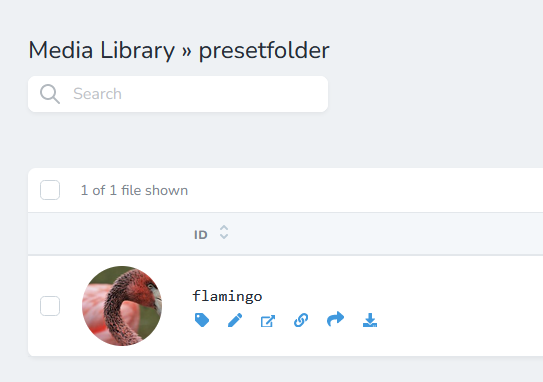
The Upload Preset Widget also sends back the data about the file uploaded, so if you would like to for example connect the file data with the user that uploaded it on your website you can do so by listening to an event with a simple script like this (don't forget to wrap it in <script></script> tags):
var eventMethod = window.addEventListener ? "addEventListener" : "attachEvent";
var eventer = window[eventMethod];
var messageEvent = eventMethod === "attachEvent" ? "onmessage" : "message";

eventer(messageEvent, function (e) {
    if(e.data.event_id == "publitio_file_uploaded"){
        console.log(e.data.data);
    }
});
I will make another custom HTML block in my Wordpress page and paste this exact code in it so you can see it in action.
Now when a file has been uploaded a console log will show all the data about the uploaded file which you can use to do anything you would like although this does require some amount of coding skill.
Let me know what you think about our newest feature or what feature you would like to see next.
Happy uploading!


